Going back into substance after only having a glimpse during the summer proved a bit difficult:
I had followed The Substance Painter Fundamentals tutorial on pluralsight, but some parts proved difficult, so these following links helped a lot especially when trying to follow between arnold and substance.
- bump mapping arnold: https://support.solidangle.com/display/AFMUG/Bump+Mapping
- bump mapping- switching between colour channels: https://forum.allegorithmic.com/index.php?topic=6833.0
- Reading between arnold and substance painter: https://www.allegorithmic.com/blog/substance-painter-arnold-ultimate-guide-olivier-couston
- Arnold has a wireframe shader: https://support.solidangle.com/display/AFMUG/Wireframe
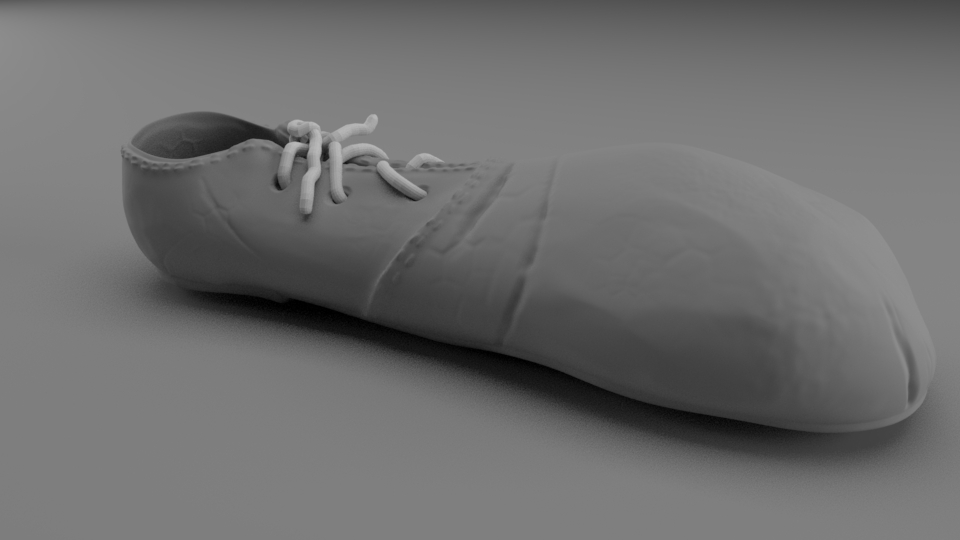
I sculpted the shoes in zbrush and created the laces using the curve tubes brush tool within the software too. I then brought them into maya and made them live objects, before using the quad draw tool to reduce the polygon count.
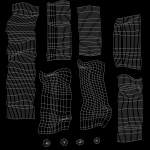
Following an edge loop pattern similar to these and studying these textures I reduced the resolution of the shoes (around 1million polys) to 6.3k. Still a lot, but this is a short film, not a game.


Sculpted Shoes: I created the laces just using the curve tubes tool- but they might have been easier to build in maya.


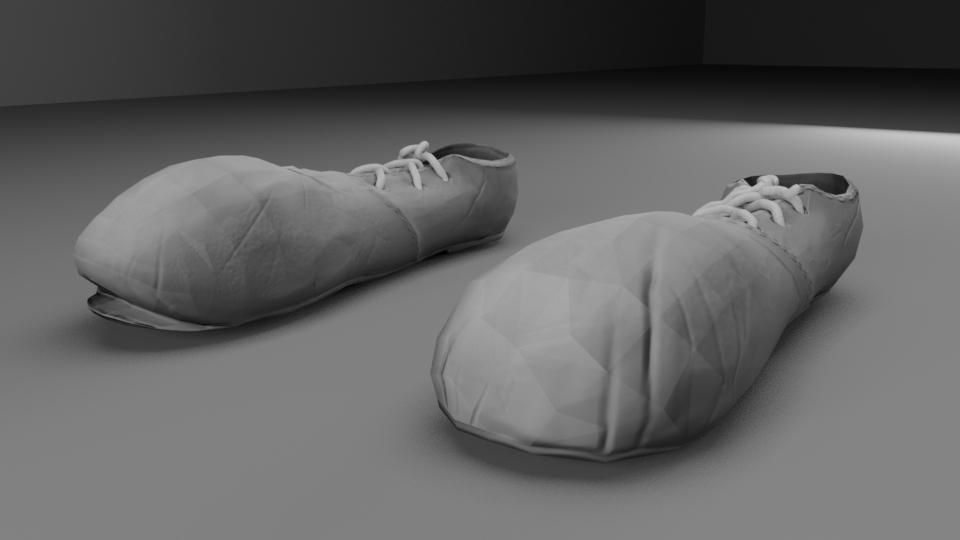
High poly render of the left shoe:
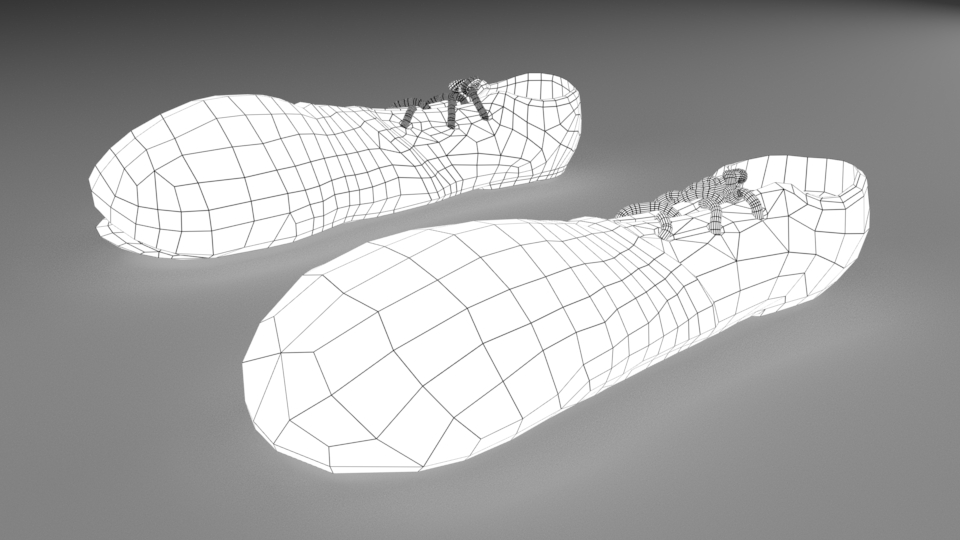
Reduced with normal maps:


I found out that arnold has a wireframe shader which was a life saver after all the trouble I had trying to get it in mental ray in second year. From this, I rendered out an ambient occlusion map within x-normals, baked out a cavity map and screen map from my normal map, and overlayed them onto my ambient to give a nicer result following this tutorial: http://www.donaldphan.com/tutorials/xnormal/xnormal_occ.html.
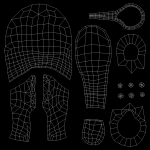
I also hate Uving, but the unfold tool proved to be a godsent in 2018 and has improved so much, as well as the option to show where the seams are, so it’s easier to unwrap while working on the 3d model instead of just in the uv editor.


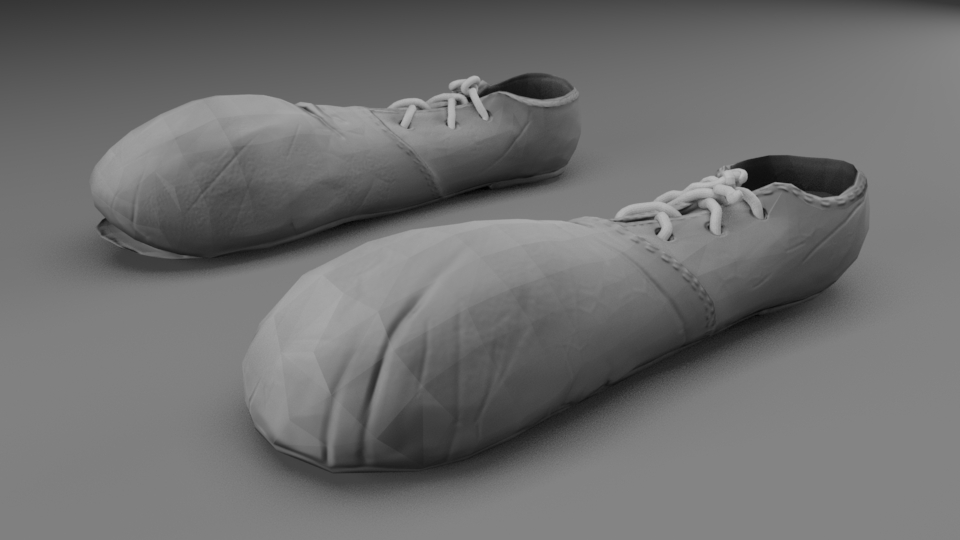
Right shoe high poly results:


Low poly with the adjusted ambient occlusion map:


The reason my edges are still a little hard is because I was told never to use the soft mode in maya because it isn’t ‘real’ however, it can still be rendered as soft if I wanted it to be. I just softened the edges.
This video helped me a lot when bringing over my maps from substance to arnold, however I had to play around with some different maps, as the programmes have been updated since.
What I also followed: https://support.allegorithmic.com/documentation/display/SPDOC/Arnold+for+Maya
I used arnold 4 surface export option in substance to get the diffuse, ior, normal, roughness and specular maps:


I had a lot of difficulty to begin with, especially with the roughness map because I initially saved it out under metalness and it would not show up correctly, however plugging it through the color output (under r of the rgb) into the specular roughness worked best instead of using the alpha channel.
Setup that eventually worked using the arnold surface shader:


Results in maya arnold renderer: Issues with the roughness map. When I figured this out I realized that it looked far too shiny, so I reduced the specular.


reduced specular map:


Other texture trial just within photoshop:


set fill layer to triplanar to get rid of seams?- doesnt work.
Alec, as usual, seems to know everything, and he helped me with the exporting of maps and plugging them in correctly in arnold to get the best results:
- Export: arnold 5 standard surface.
- Plug into: arnold standard surface shader.
- Metalness- out alpha into base metalness
- Base color- out color into base color
- Roughness- out alpha into specular roughness
- Normal- plug into bump maps into tangent spaced normals-
- Color space set to raw and alpha is luminous ticked for metalness/roughness/normals
HIGH>LOW POLY Result


