So I thought researching some tilable texturing would make the project a lot easier, especially for cobblestones/bricks on walls/ some patterns. Little did I know that tilable meshes are a whole other world to tilable textures. This was my first major mistake.
Cobblestones will be taking over our entire street, so I thought it would be great for them to be tiled.
Sculpting the cobblestones:
Attempting to tile the textures:
I feel that they turned out extremely boring and flat, so I made the bottom area a tileable texture and then just took the 10 different cobblestones, and plan to instance them in a small area and just instance it throughout. This is the cobblestone floor instanced around:
To take a little bit of a break, I decided to model the characters’ eyes. I looked at these tutorials:
Sculpt:
Mapping:
Samuel’s eyes: These are a little bit too much in my opinion so I may end up removing some of the small brown specs as they are very defining. I think the hazel and green will really complement the freckles and red hair.
Both eyes: We thought Walter would suit pale blue almost grey eyes. These are quite common in older people. I just can’t seem to grasp that big specular highlight even though I have the outer eye layer as very see through and completely reflective.
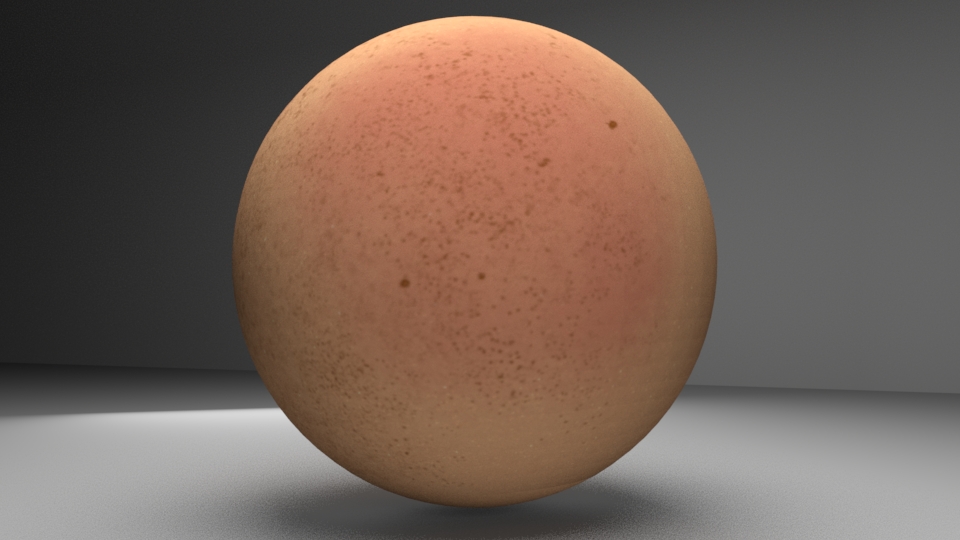
I decided to do another texture sample within substance painter of skin:
It looks a little like an egg for now, and I thought if it was painting within substance painter, that it would cover seams (these aren’t shown in the render), and I researched that projecting the textures as triplanar would help but it made no difference, so I will have to make sure when uving that my seams are definitely hidden for now.
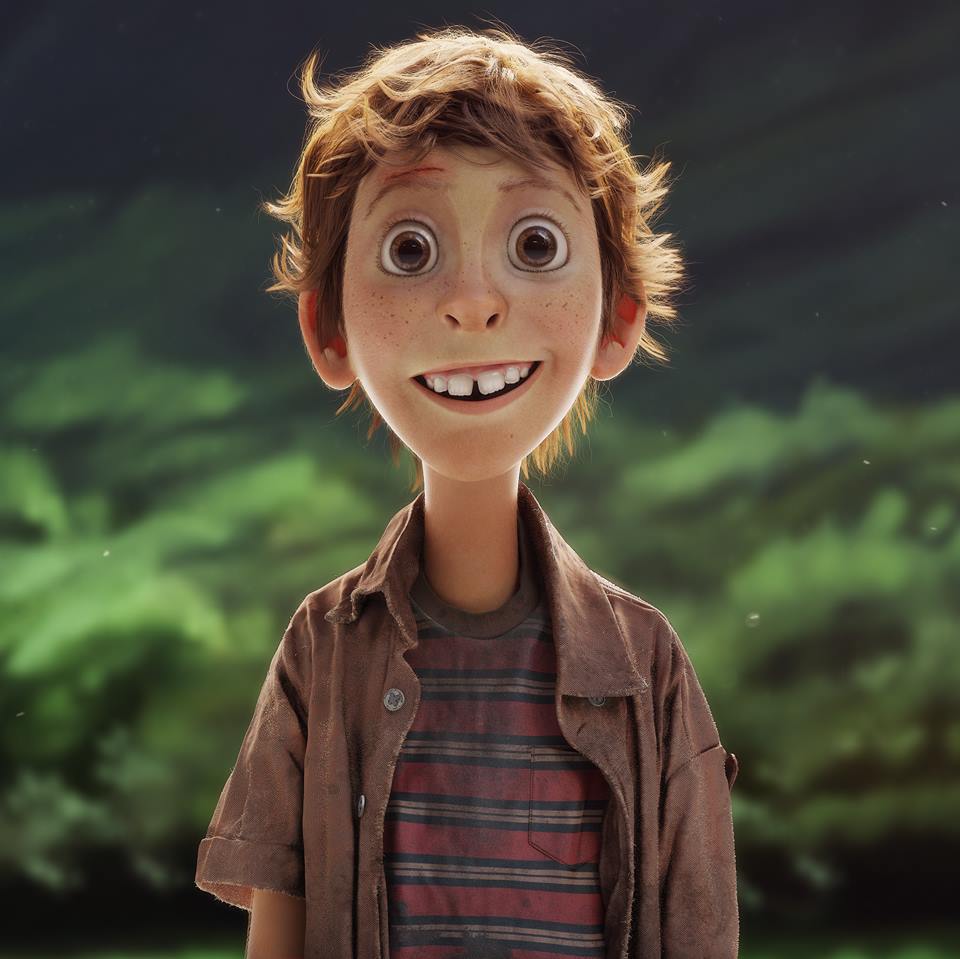
One of the focuses whilst modelling and texturing our characters will be the hair because we do want to make it more realistic as we have seen so many more cartoon-like characters such as Omar Taher’s sculpt based off of a concept by Jeff Delgado (link):
Alec also sent my team and I a link to a gorgeous tutorial that I followed by Michael Cauchi (link). I figured that this would be a lot easier since it followed my own flow from zbrush to maya.
Workflow that helped take away any issues I had with Cauchi’s when trying to create curves out of the zbrush curve tubes:
Convert geo to nurbs surface (Modify- convert polygon to subdiv, modify- convert subdiv to nurbs)
Nurbs surface>curves- issues here.
Make sure arnold render curve hair shader is ticked to render.
I could not figure out how to get red hair even with the research on solid angle, however, Alec figured out that my lighting was the issue, so I continued working with the skydome lighting. I know we initially wanted a more orange hair, but the Auburn was so lovely.
Experimenting from more clay-like feel to more realistic and from straight to more curly:
Color and Feel progress: I think these are closer to what we want, but I have to keep in mind that the hair will be shaped more like the sculpt and there will be many more tubes to turn into curves that will add to the stray hairs and will have a more realistic feel:
Going back into substance after only having a glimpse during the summer proved a bit difficult:
I had followed The Substance Painter Fundamentals tutorial on pluralsight, but some parts proved difficult, so these following links helped a lot especially when trying to follow between arnold and substance.
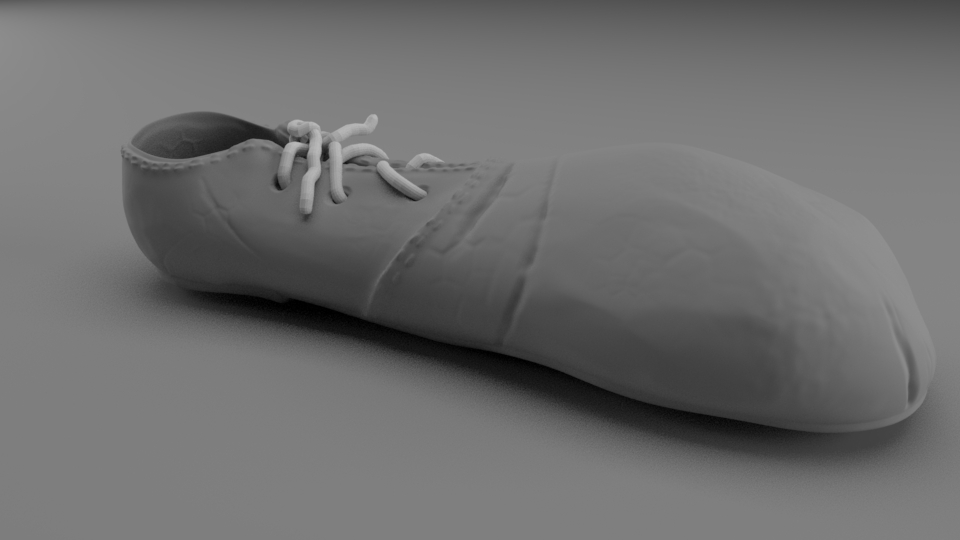
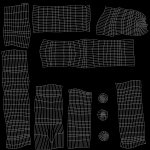
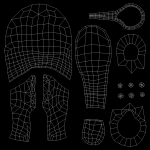
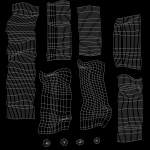
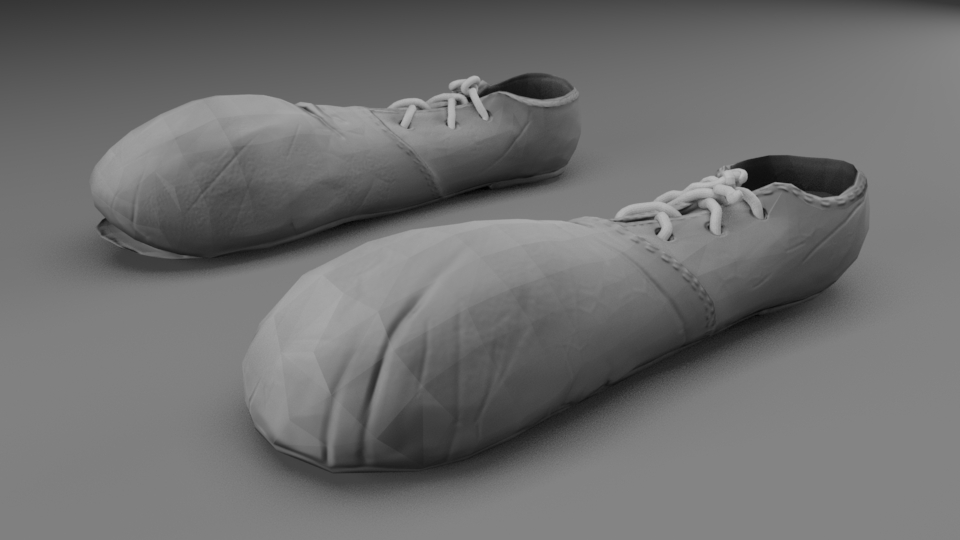
I sculpted the shoes in zbrush and created the laces using the curve tubes brush tool within the software too. I then brought them into maya and made them live objects, before using the quad draw tool to reduce the polygon count.
Following an edge loop pattern similar to these and studying these textures I reduced the resolution of the shoes (around 1million polys) to 6.3k. Still a lot, but this is a short film, not a game.
Sculpted Shoes: I created the laces just using the curve tubes tool- but they might have been easier to build in maya.
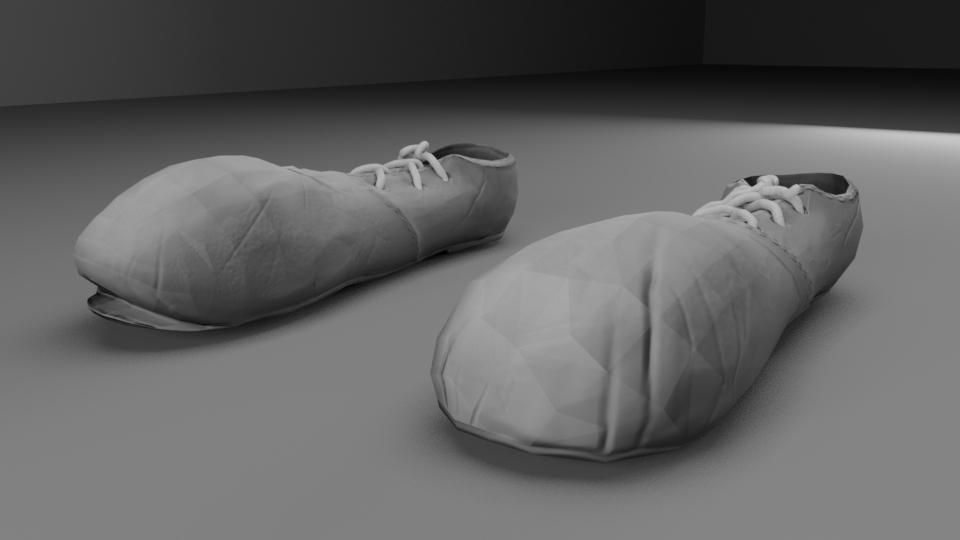
High poly render of the left shoe:
Reduced with normal maps:
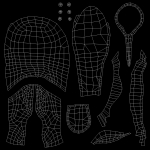
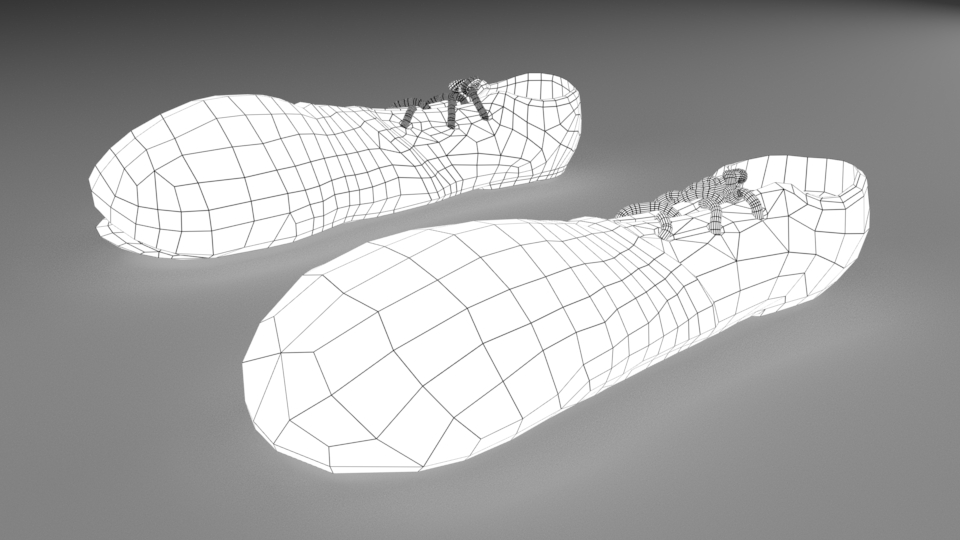
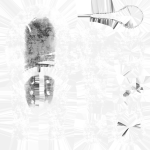
I found out that arnold has a wireframe shader which was a life saver after all the trouble I had trying to get it in mental ray in second year. From this, I rendered out an ambient occlusion map within x-normals, baked out a cavity map and screen map from my normal map, and overlayed them onto my ambient to give a nicer result following this tutorial: http://www.donaldphan.com/tutorials/xnormal/xnormal_occ.html.
I also hate Uving, but the unfold tool proved to be a godsent in 2018 and has improved so much, as well as the option to show where the seams are, so it’s easier to unwrap while working on the 3d model instead of just in the uv editor.
Right shoe high poly results:
Low poly with the adjusted ambient occlusion map:
The reason my edges are still a little hard is because I was told never to use the soft mode in maya because it isn’t ‘real’ however, it can still be rendered as soft if I wanted it to be. I just softened the edges.
This video helped me a lot when bringing over my maps from substance to arnold, however I had to play around with some different maps, as the programmes have been updated since.
I used arnold 4 surface export option in substance to get the diffuse, ior, normal, roughness and specular maps:
I had a lot of difficulty to begin with, especially with the roughness map because I initially saved it out under metalness and it would not show up correctly, however plugging it through the color output (under r of the rgb) into the specular roughness worked best instead of using the alpha channel.
Setup that eventually worked using the arnold surface shader:
Results in maya arnold renderer: Issues with the roughness map. When I figured this out I realized that it looked far too shiny, so I reduced the specular.
reduced specular map:
Other texture trial just within photoshop:
set fill layer to triplanar to get rid of seams?- doesnt work.
Alec, as usual, seems to know everything, and he helped me with the exporting of maps and plugging them in correctly in arnold to get the best results:
Export: arnold 5 standard surface.
Plug into: arnold standard surface shader.
Metalness- out alpha into base metalness
Base color- out color into base color
Roughness- out alpha into specular roughness
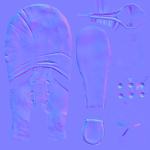
Normal- plug into bump maps into tangent spaced normals-
Color space set to raw and alpha is luminous ticked for metalness/roughness/normals
Although we are currently working on our script for The Knocker Upper, and still planning our competitive scene, a lot of the technical challenges we will be facing remain the same.
Modelling: Our pipeline for most of our modelling, especially the characters will be back and forth between Maya and Zbrush. Zbrush allows us to add extra details such as scarring, some pores, and indents and surface scratches in the inorganic scene objects and houses.
Texturing: Although I have previously used x-normals to bake in AO maps and normals, I have played around in Substance Painter and plan to learn a lot more to mimic the soft textures in ‘Justino’ (2015) and take inspiration from ‘The Boxtrolls’ (2014).
Rigging: I do not have any experience with rigging, but I am willing to learn if we cannot get any good riggers in the classroom to help out. We definitely need amazing facial rigs to achieve great expressions on our characters.
Animating: We really want to push our animation skills by exaggerating our characters expressions and energy to be more cartoony and follow on from the animations in the previous post such as ‘Geri’s Game’ (1990) and ‘A Love Story’ (2016).
Hair: We hope to have realistic hair similar to that in ‘Justino’ (2015) to make our characters look softer but if this doesn’t work out as planned, I think it would be lovely to have a sculpted look, similar to the characters in ‘The Boxtrolls’ (2014). We hope to try out Maya 2017 as XGen interactive hair grooming has apparently gotten a lot easier to use. I also may consider changing geometry into hair.
Breaking Simulations: We may either cut to things already being broken or have a few shots with the simulations e.g. milk bottles breaking, signs breaking, windows breaking. I think it would be really interesting to see this instead of just hearing them so it would be good to research into these in maya.
Rendering: Rachel learnt a lot on her placement with Flickerpix about rendering layers in arnold so it will be great to learn from her to help out with all of this. I will need to be practicing along the way to test my textures.
Special Effects: We need to look into smoke/fog effects either in Maya or looking into it in after effects whilst editing. I think it would look amazing in the starting scenes on the street. We could look into dirt particles too to have the place a bit dusty. It would be stunning with light bouncing off.
Editing: We will be editing our animation in after effects and premiere pro, and hopefully having a couple of weeks at least to do this before feedback.
Sound: As previously mentioned, we hope to have some music similar to that of the early 19th century during the industrial revolution. Rachel knows some people studying music in Queen’s University, and Conann mentioned that he’d be willing to talk to their tutors about collaborating on this years animations. Our sound will be key as we will have no dialogue.
Planning
Rachel was great enough to draw up some timetables for us throughout the year but these will be subject to change once we get stuck into the workload:
We seem to be gravitating towards the 1830s for the time period of our animated short. This gives us about 20 years before alarm clocks were even invented and around 100 years before the job of the knocker upper died out (The History of the Knocker Upper and Story Development).
During this time period, classical music began to be recognised as an important element of British culture. Irish composer John Field (1782-1837) was highly influential as was the German Felix Mendelssohn who visited Britain from 1829. British singers Michael Kelly, Nancy Storace and John Braham following on from Mozart (1756-1791). Source
With the industrial revolution, the music of the labouring classes included industrial work songs, but it is difficult to find any online of what these may be.
A more upbeat classical piece of music would be suitable for our short film to emphasize the competition.
Gioachino Rossini- William Tell Overture (1829)
Clara Schumann- Piano Concerto, op. 7 (1833)
Mozart- Eine Kleine Nachtmusik, K. 525: I. Allegro
We want to incorporate the sound as a narrative device as we will have no dialogue, just sounds of things breaking and perhaps the tapping noises on the windows along with the music. However, if we could manage it we did discuss the tapping of windows and other sounds turning into a tune that speeds up as the competition picks up. Something similar to ‘Trashin’ the camp’ in Tarzan (1999), but with a classical twist.