Multi-Part Project Reflection

Overall, I really think I could have done so much better in each area of this project. I think that it was mostly over estimating how much I could get done. I spent so much time in the beginning thinking of ideas and loads of time researching with very little to show. However, I learnt a lot from this and I definitely will not leave my blog to the last minute again so I hope some of my research will come across well.

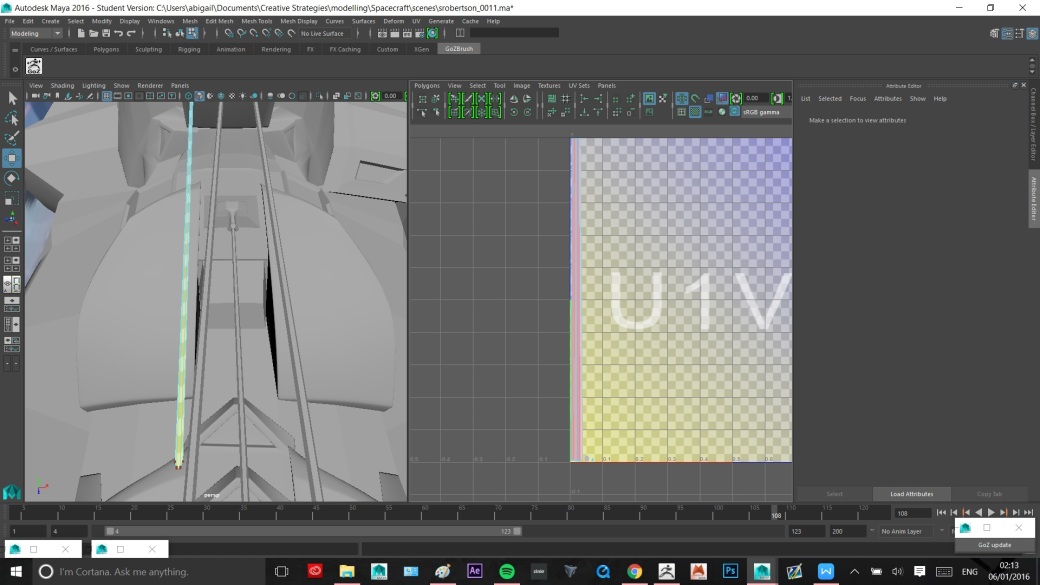
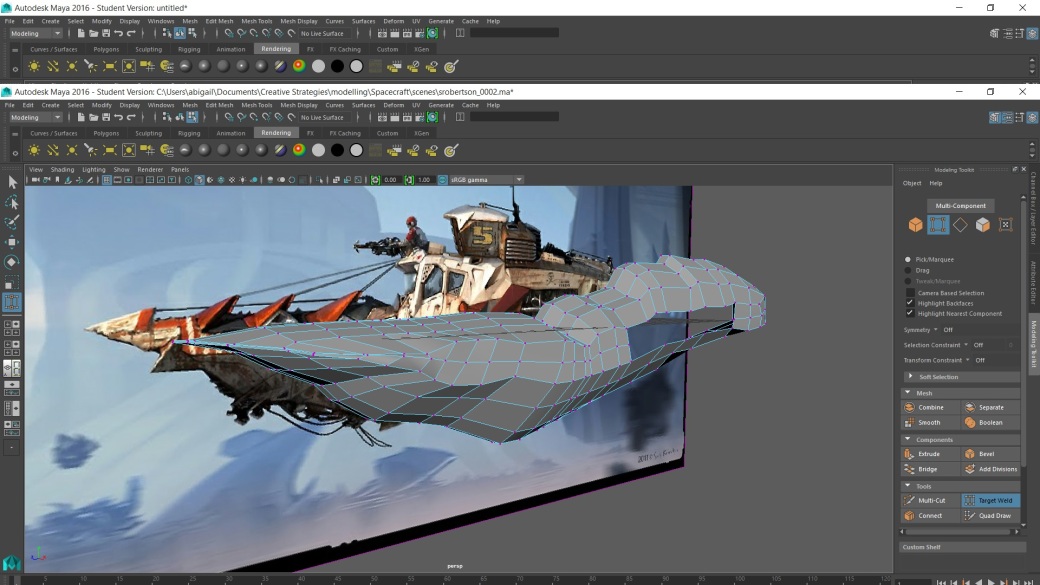
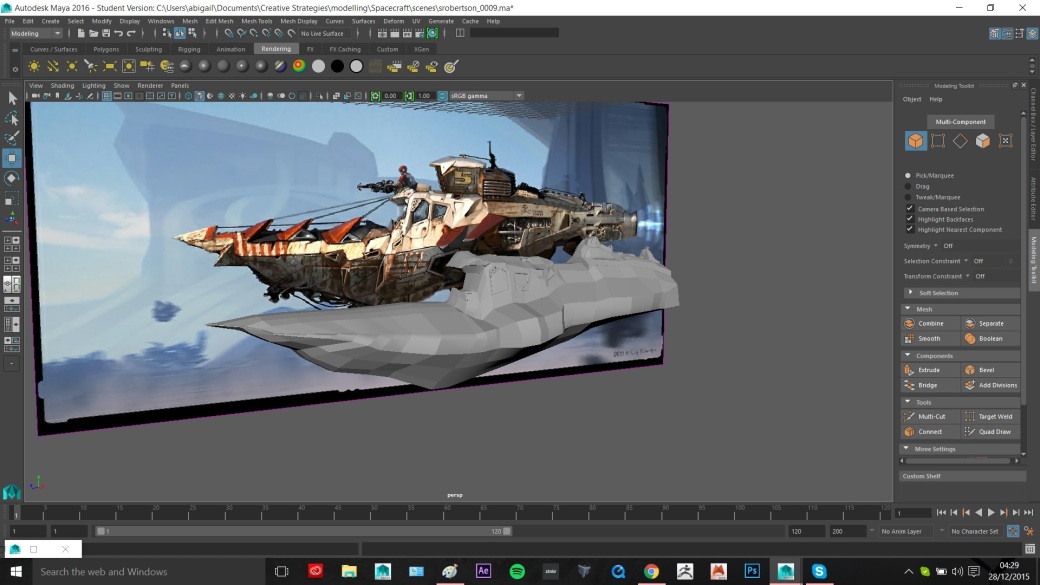
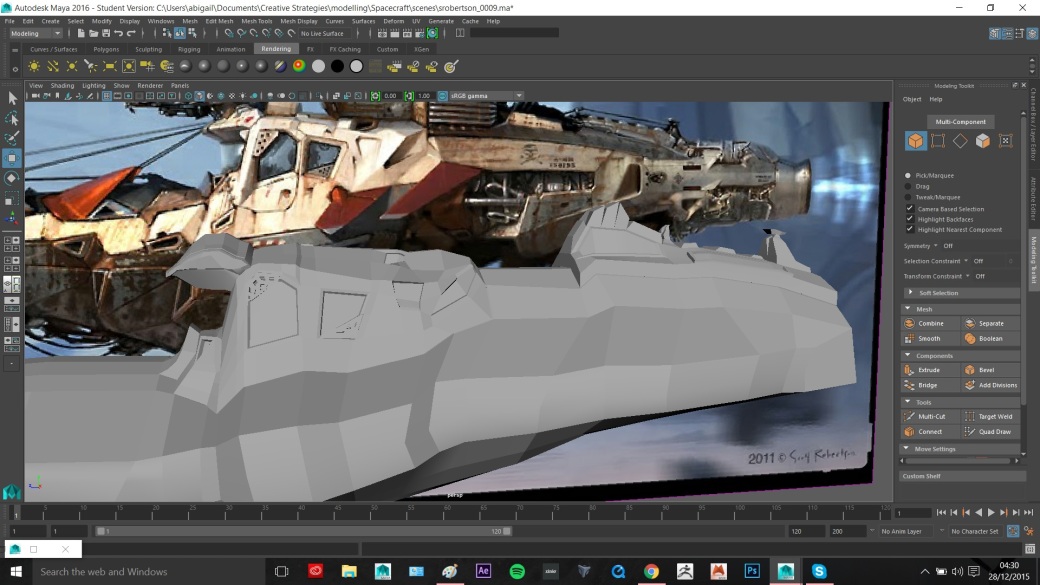
I learnt new ways of modelling, such as using vectors from illustrator and bringing them in and I also learnt better ways of hard surface modelling within maya such as duplicating faces and building off of these to make pieces fit together nicely. I also had rarely animated anything…basically nothing since February 2015 so it really is not my strong suit, but to be honest I learnt from Digital Tutors and feel like I really got into the swing of it and enjoyed it once progress started to show in my animations.

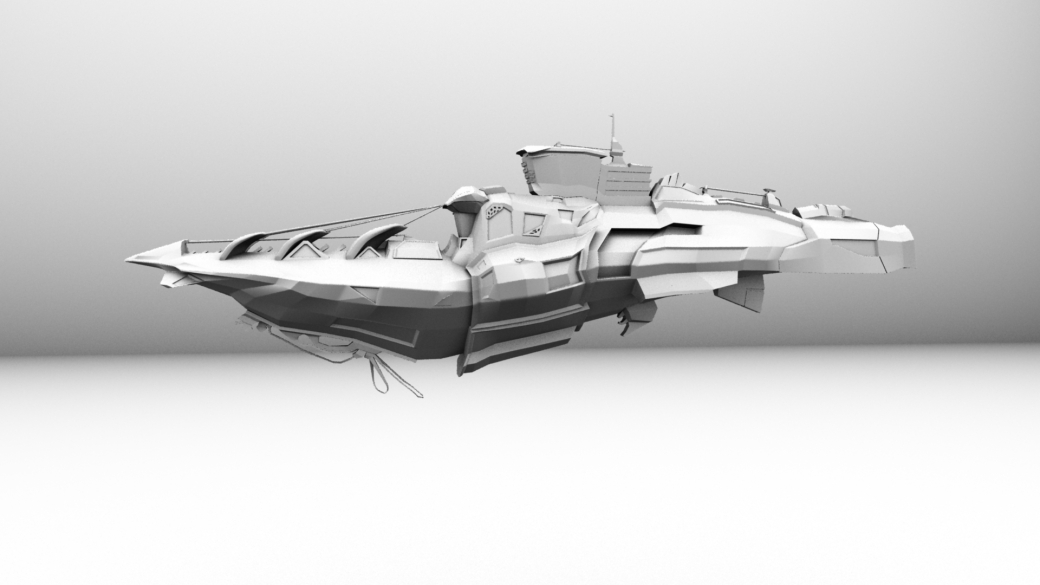
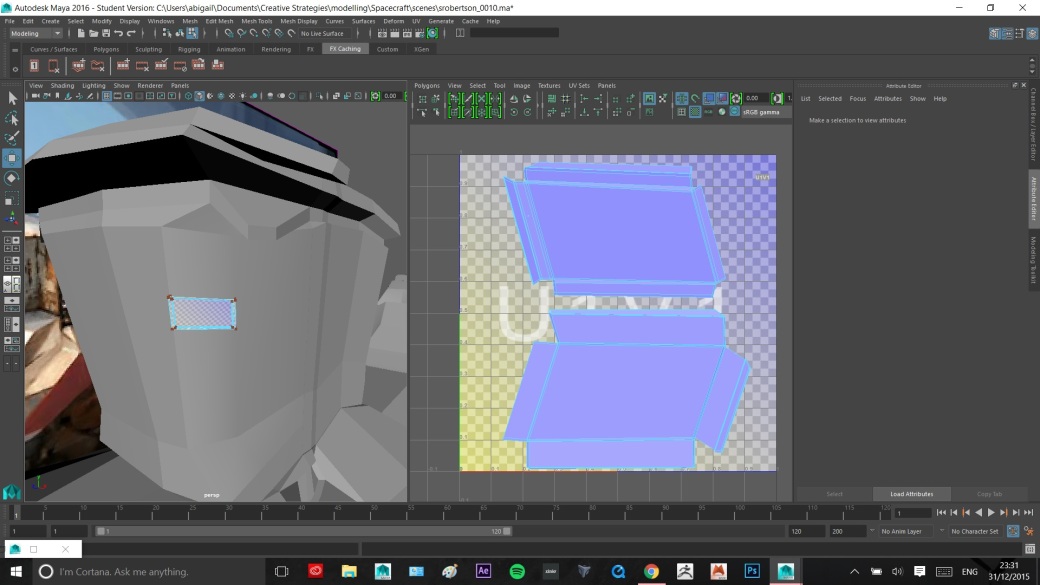
I absolutely adore ZBrush. I am quite pleased with how this model turned out as it is my first real attempt at using ZBrush and I learnt so much with Digital Tutors. I still could have so much more done and have not had the chance to retopologise my model. I also didn’t find the time to finish UV unwrapping my other models which is a shame.

I will be sure to manage my time better after this project and set deadlines for myself up to hand in.

Final Scene Render

I still think the ambient occlusion pass is a bit dark but Christian added in extra ships and it looks better as a whole.

I would also love to model a bit more to add to the scene. Something else to bring the bridge and Natasha’s platform together, perhaps looking more at some of the concepts from Halo 5: Guardians.


Some rendered images with ambient occlusion:

Fullscene_render_001.jpg12528323_640565136085381_1260821695_o.jpg12510779_640565142752047_1788516102_o.jpg12494435_640565139418714_1211505487_o.jpg

Our scene set-up

It took a while to set the scene up and get everything in a similar angle.

Blayne animated my ship in the scene. I helped set up the position and size of my skyguard model to make it look very ‘epic’ and vast in size. The whole scene looks small without Christians land but this is the playblast Christian uploaded of the scene so far:

I rendered it in the Wireframe on shaded view to see the difference:

Ship Renders

It took a while to model but I quite like how it turned out. There are a lot of separate models within my model which I realise is a lot easier to put together, you just have to make sure it fits. Duplicating faces from the original shape and building from this really helps.

rendered_ship_001.jpgrendered_ship_002.jpgrendered_ship_003.jpgrendered_ship_004.jpgrendered_ship_005.jpgrendered_ship_006.jpg

Ship UV Unwrapping

I haven’t had time to UV Unwrap every part of the ship but I managed to UV Unwrap any parts that were then duplicated as instances anywhere on the ship. I still have about 6 things on the ship to UV Unwrap as I had made so many different pieces of geometry but it would be good to finish this up for texturing it eventually.

Perhaps I could texture it for my showreel.

wip_0008.jpgwip_0009.jpg

wip_0007.jpgwip_0011.jpgwip_0012.jpgwip_0013.jpgwip_0010.jpgwip_0014.jpg

UV Snapshots to bring into Photoshop to texture:

Ship Modelling

These just show the beginnings of my ship modelling. I used the draw polygon tool to draw the basic shape of the ship, where I knew that I could build other parts on top of. I extruded this and again, I only made half of each part at a time and mirrored pieces over as instances to save time and polygon count.

Some progress images:

wip.jpgwip_0001.jpgwip_0002.jpgwip_0003.jpg

I liked adding some of the little details like the little window protectors. It really added to the model:

wip_0004.jpg

wip_0005.jpgwip_0006.jpg

Scott Robertson

I adore this man’s work!!! His unique creations are amazing.

He was particularly inspiring for his vehicle concepts:


I think something more unique and with more hard edges would match the scene more on a whole:

My favourite was this piece. I liked it because we had initially decided that our whole scene was a ruining ship landing deck. This looks like it could be a scavanger ship and I really love the design. It will be fun to model!:

s_robertson_01.jpg

Darren Bartley

http://fightpunch.tumblr.com/

http://fightpunch.deviantart.com/

Vehicle modelling ideas!!!!!

I’m excited to model something different. At first I had looked at Darren Bartley’s models and had included them in a composition sketch at the beginning. They are unusual and interesting.

Some of his vehicle designs look very organic, and would be easier to model in zbrush. They look like they could potentially be creatures.

sub_transports_by_fightpunch-d64jer5.jpg

We went with more hard surface modelling concepts to match the rest of the scene. I was interested in these :

I also love these strange mech designs. I drew these in a compositional sketch earlier. I think they are more unique :


Skyguard Renders

I started by taking some with a blue light before I learnt how to use occlusion:

samplepicture_008.jpgsamplepicture_009.jpg

I added vectors to the inside of the model as we had only planned to glimpse this in the final animation of the scene.

samplepicture_011.jpg

samplepicture_010.jpgsamplepicture_003.jpgsamplepicture_002.jpg

Close up of the vector detail:samplepicture_001.jpg

I added some of the different vectors I had created underneath the model to make them look like grates.

samplepicture_006

Occlusion:

Add a new render layer with the objects in it, rightclick overrides, material overrides, surface shader, go to the out colour in attributes and select mib_amb_occlusion under mental ray.

Samples-50

Max distance- depends on how big the scene is.

I love the ambient occlusion as it makes my objects look a lot cleaner, but the inside of my object turned out to look very dark so detail got lost.

occlusion_002.jpgocclusion_003.jpgocclusion_006.jpgocclusion_001.jpgocclusion_004.jpgocclusion_005.jpg


UV Unwrapping the Skyguard

The key is to unwrap before making any duplicates and to make extra geometry to make unwrapping certain things easier. My model had a lot of parts to it and I managed to unwrap most of it.

I took images with the checker option to show that they aren’t stretched. I really spent too much time in the UV editor overall with my model.

WIP_001.jpg

longestuvunwrapofmylife._009.jpglongestuvunwrapofmylife._006.jpglongestuvunwrapofmylife._007.jpglongestuvunwrapofmylife._010.jpg

longestuvunwrapofmylife._011.jpglongestuvunwrapofmylife._012.jpglongestuvunwrapofmylife._013.jpglongestuvunwrapofmylife._014.jpg

UV Snapshots to bring into photoshop to texture afterwards. There is more here to show for the unwrapping of the bridge and cables.